Frequently Asked Question
ITVDesk can configure Internet access to a live virtual camera stream by using UPnP port mapping when the router supports it. This lets ITVDesk request the required router rules for a remote VMS/NVR, recorder, or protected site without manually opening every port in the router interface.
The ITVDesk External Access window can expose only the services required by the selected virtual camera: ONVIF / Web HTTP, ONVIF / Web HTTPS, RTSP, and RTSPS. The same dialog also validates whether the UPnP rule was created and whether the mapped port is reachable from outside.
Use external access only when it is really required. For production and enterprise deployments, prefer VPN, private routed networks, firewall allow-lists, HTTPS, and RTSPS whenever supported by the remote VMS/NVR.
Before using External Access
- The ITVDesk virtual camera is started and the local stream has been tested.
- The router supports UPnP and UPnP is enabled, or you can create manual router/firewall rules.
- The router has a public Internet IP address, or the remote VMS/NVR reaches it through VPN/private routing.
- The network is not blocked by carrier-grade NAT, double NAT, or an upstream firewall.
- Windows Firewall, Linux firewall, macOS firewall, or endpoint security allows the ITVDesk service ports.
Open the ITVDesk External Access window
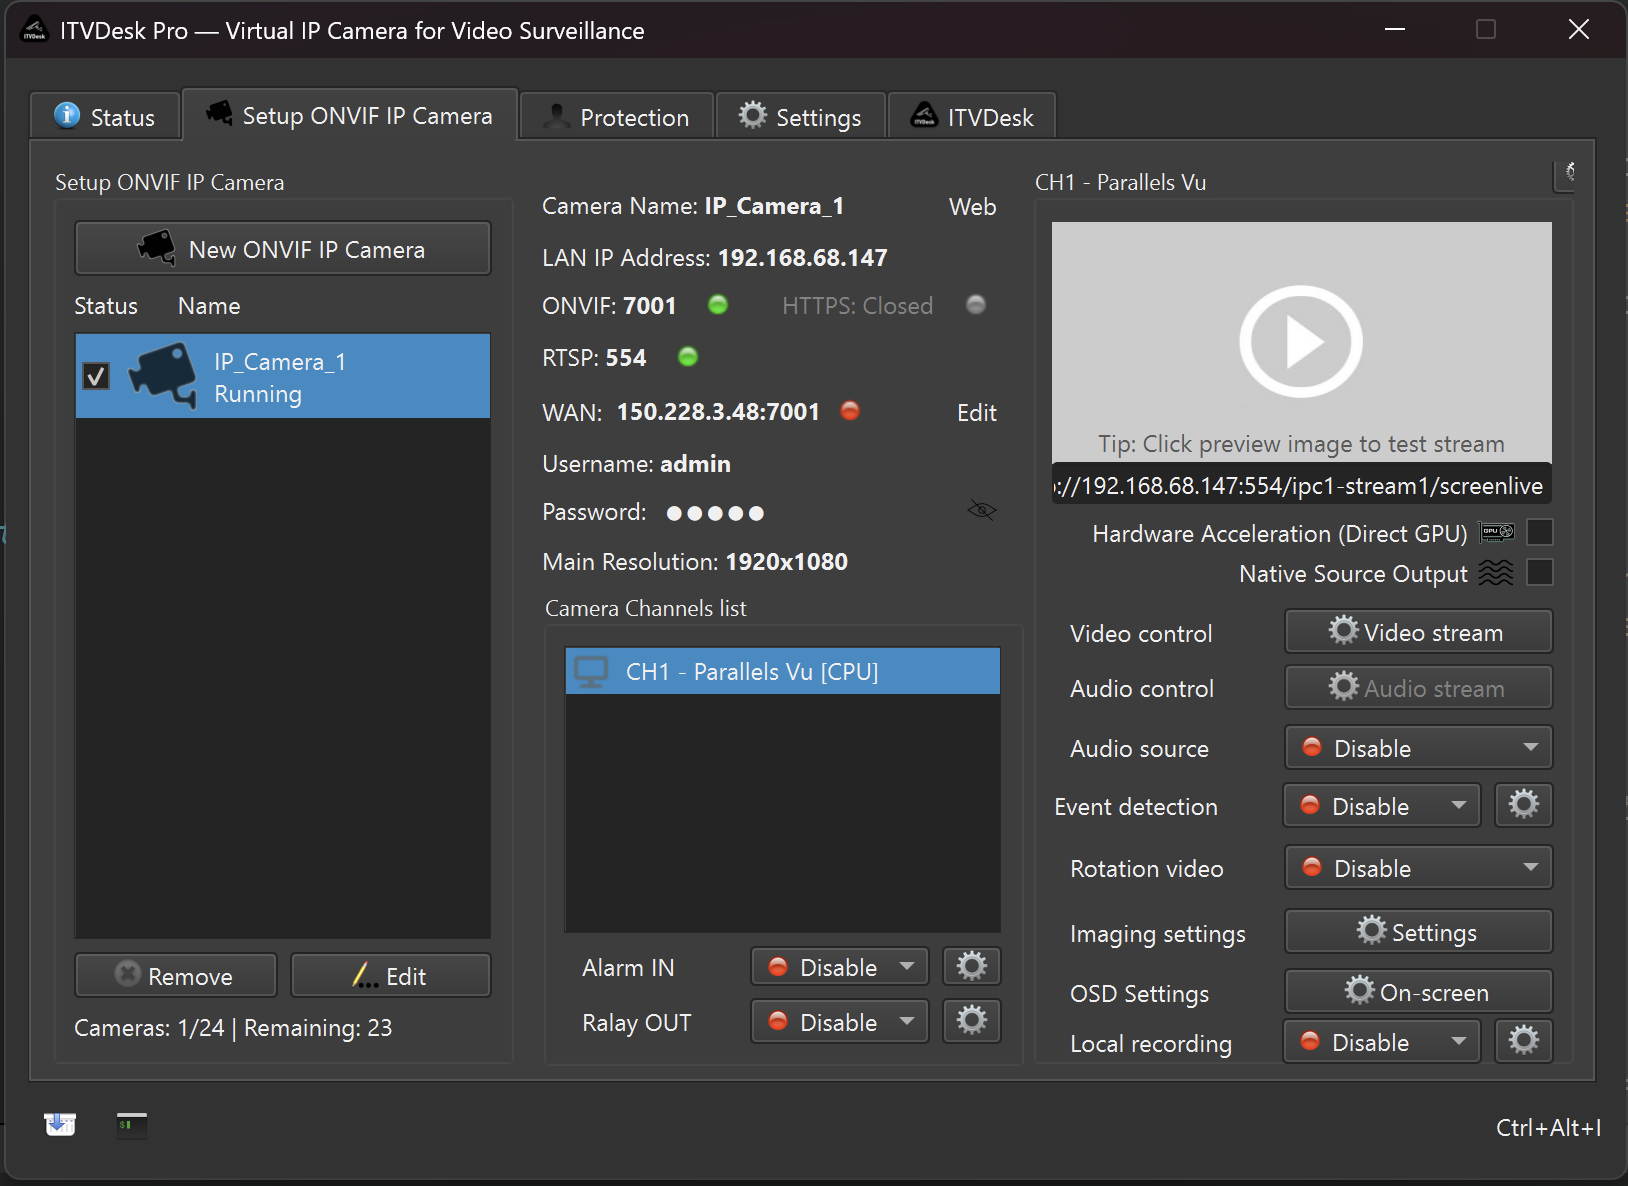
- Start ITVDesk and open Setup ONVIF IP Camera.
- Select the virtual camera you want to expose externally.
- Verify the local LAN IP Address, ONVIF port and RTSP port.
- Click Edit next to the WAN line.
- The Configure External Access window opens for the selected camera.
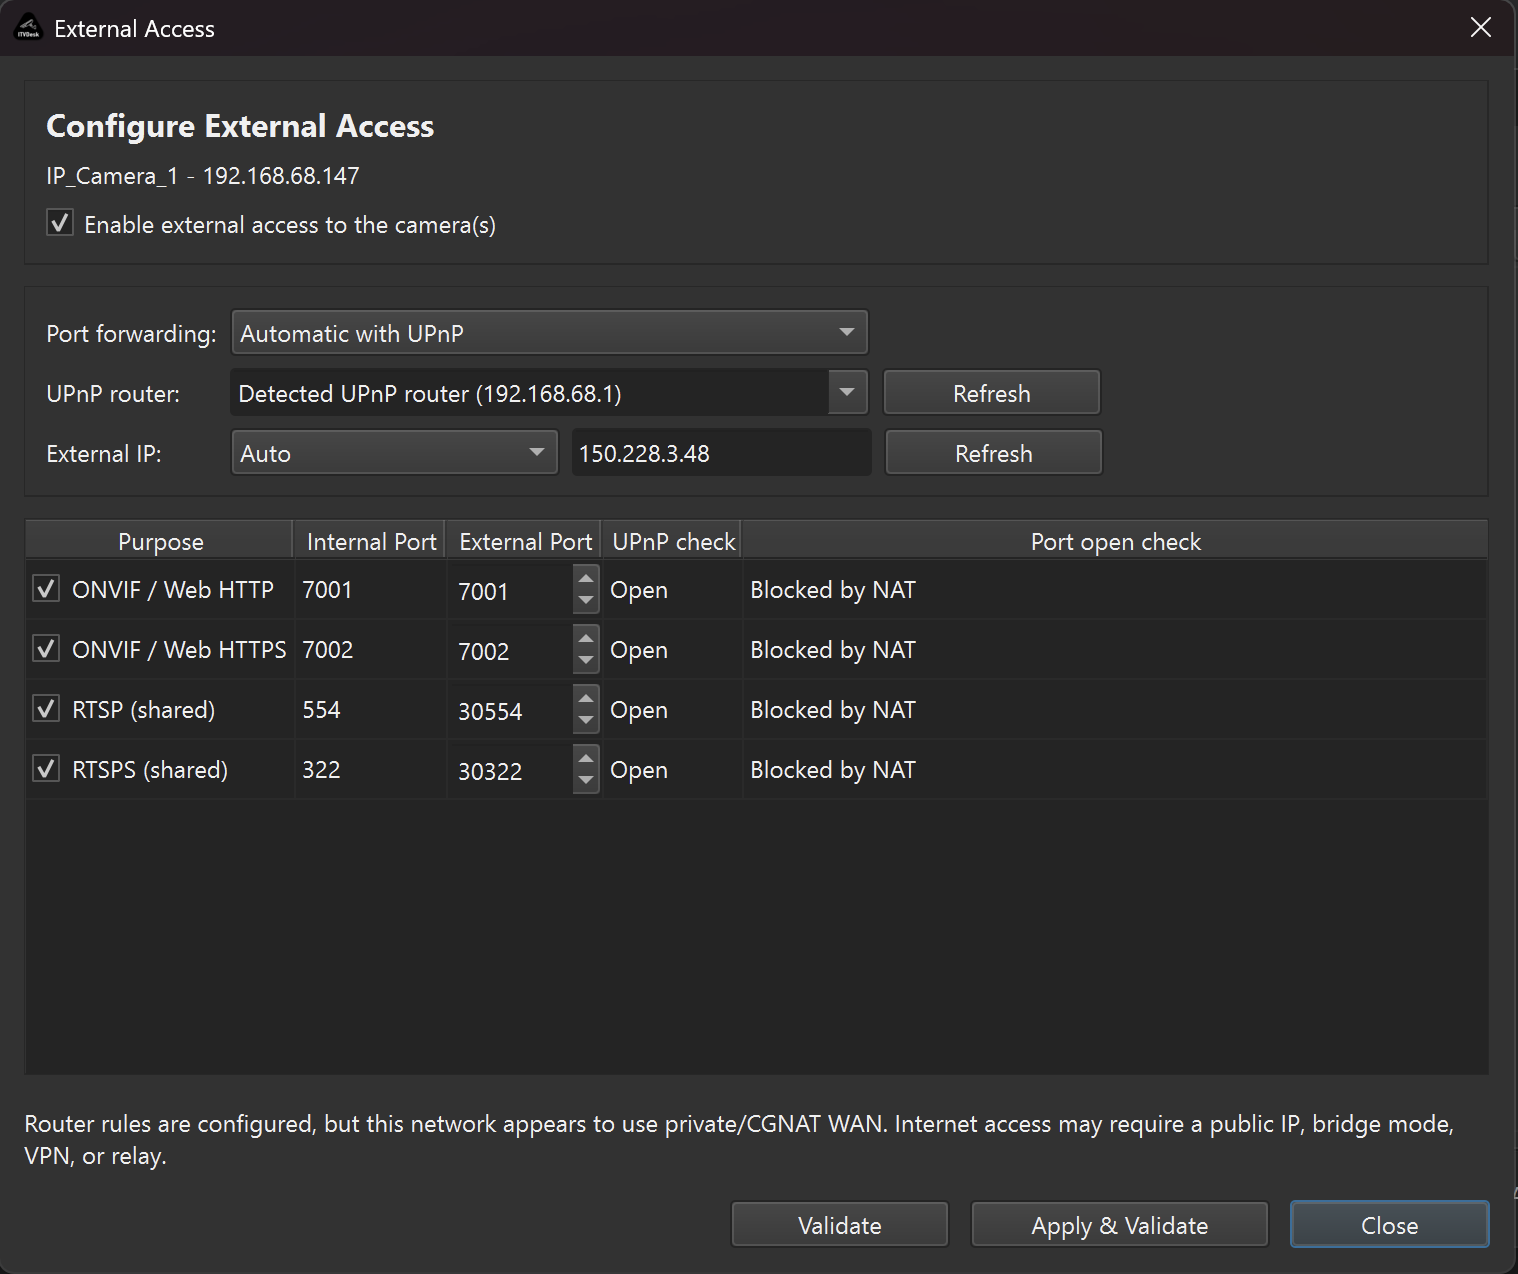
Configure Automatic with UPnP
- Enable external access to the camera(s).
- Set Port forwarding to Automatic with UPnP.
- Select the detected UPnP router, or click Refresh if the router is not listed.
- Set External IP to Auto, or enter the public IP manually if required.
- Select only the mappings you need: ONVIF / Web HTTP, ONVIF / Web HTTPS, RTSP (shared), and/or RTSPS (shared).
- Adjust the External Port only if the default port conflicts with another device or policy.
- Click Apply & Validate.
Understand the validation result
- UPnP check: Open means the router accepted the mapping request.
- Port open check: Open means the mapped port appears reachable from outside.
- Blocked by NAT means the router rule may exist, but the public path is blocked by private WAN, CGNAT, double NAT, firewall, bridge mode requirement, VPN policy, or ISP routing.
- If the router is behind CGNAT, UPnP can succeed locally but the camera will still not be reachable from the public Internet.
Which mappings should be enabled?
- ONVIF / Web HTTP - use only when plain ONVIF/HTTP access is required by the recorder.
- ONVIF / Web HTTPS - preferred when the VMS/NVR supports secure ONVIF or HTTPS service access.
- RTSP (shared) - use for direct RTSP stream URLs and broad VMS/NVR compatibility.
- RTSPS (shared) - preferred for encrypted RTSP transport in protected networks and enterprise deployments.
For the smallest attack surface, enable only the rows required by the remote VMS/NVR.
Add ITVDesk to an external VMS/NVR
After validation, add ITVDesk to the remote VMS/NVR using one of these connection methods:
- ONVIF: use the external IP/DNS name, external ONVIF port, and ITVDesk ONVIF username/password.
- ONVIF over HTTPS: use the HTTPS mapping if the VMS/NVR supports secure ONVIF communication.
- Direct RTSP: use the external IP/DNS name and the external RTSP port in the ITVDesk RTSP URL.
- Direct RTSPS: use the external IP/DNS name and the external RTSPS port for encrypted RTSP transport.
Security recommendations
- Use strong ITVDesk ONVIF credentials.
- Prefer HTTPS and RTSPS where supported.
- Do not expose management or browser access unless it is required.
- Use VPN, firewall allow-lists, or private routing for production installations.
- Disable external access and remove mappings when they are no longer needed.
Troubleshooting
- If the UPnP router is not detected, confirm UPnP is enabled in the router and click Refresh.
- If UPnP check is open but port open check is blocked, check public IP, CGNAT, double NAT, ISP restrictions and firewall rules.
- If the VMS/NVR cannot add the camera by ONVIF, try manual add with the external IP, external ONVIF port and credentials.
- If live view fails, verify RTSP/RTSPS mapping, stream URL, codec and firewall access.
- If secure access fails, confirm that the recorder supports HTTPS/ONVIF over HTTPS or RTSPS.
Related documentation: Change service ports | ONVIF over HTTPS | RTSPS secure RTSP | Retrieve stream URLs and test camera access